


- Premiere Tutotial
How to Create Roll Credits in Adobe Premiere Pro

Mar 20,2019• Proven solutions
Every member of a crew is important because without them it would be impossible to complete a movie. That’s the reason why the end credits are a part of every motion picture ever made since the early days of Hollywood. Creating the opening or end credits is a relatively easy task, but formatting that text can be a painstakingly long process. If you would like to learn how to create credits you are at the right place because in this article we are going to show you a couple of different methods you can use to create credit roll in Adobe Premiere Pro.
Adding Titles and Texts to Video with Premiere Alternative FilmoraPro
While Premiere Pro is powerful enough, but it may need enough time to master how to add title and text. Hence we recommend you to try a much lower price FilmoraPro video editing software and perfect videos with Text and titles easily.
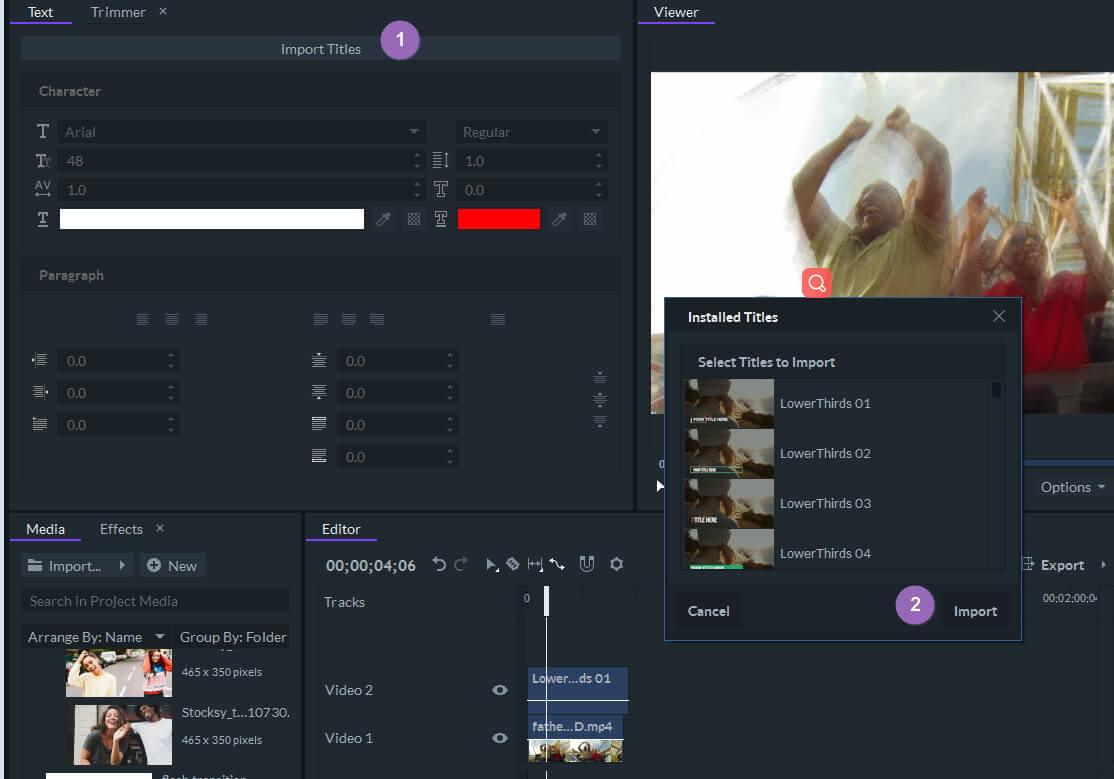
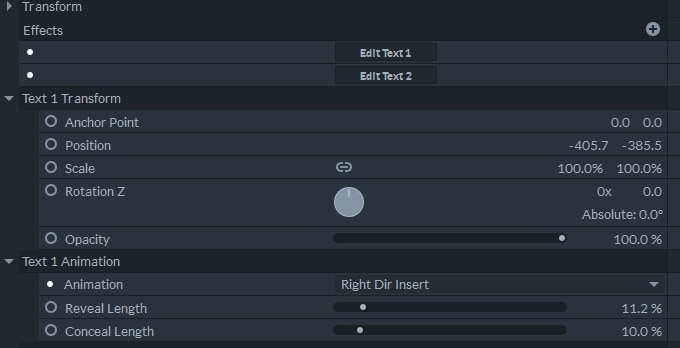
FilmoraPro has built in some stunning title and text packs, you can add it to videos quickly. Besides, you can customize the text transform and text animation by double clicking it in the timeline.
Besides adding titles, you can also add animation, do color correction and create anything you can image with these easy professional tools. Download the free trial version and try it free now.


3 Ways of Creating the Credit Roll in Adobe Premiere Pro
Adobe Premiere Pro’s Title panel has been replaced by the Essential Graphics panel, a couple of years ago. The latest updates of this video editor released in 2018 brought more powerful tools filmmakers can use to create end credits. Besides the Essential Graphics panel, Adobe Premiere Pro also offers a couple of quick and easy ways to add text at the beginning or the end of a video. So, let's have a look at how you can create rolling credits in Premiere Pro.
1. Using the Credits Packages in the Essential Graphics Panel
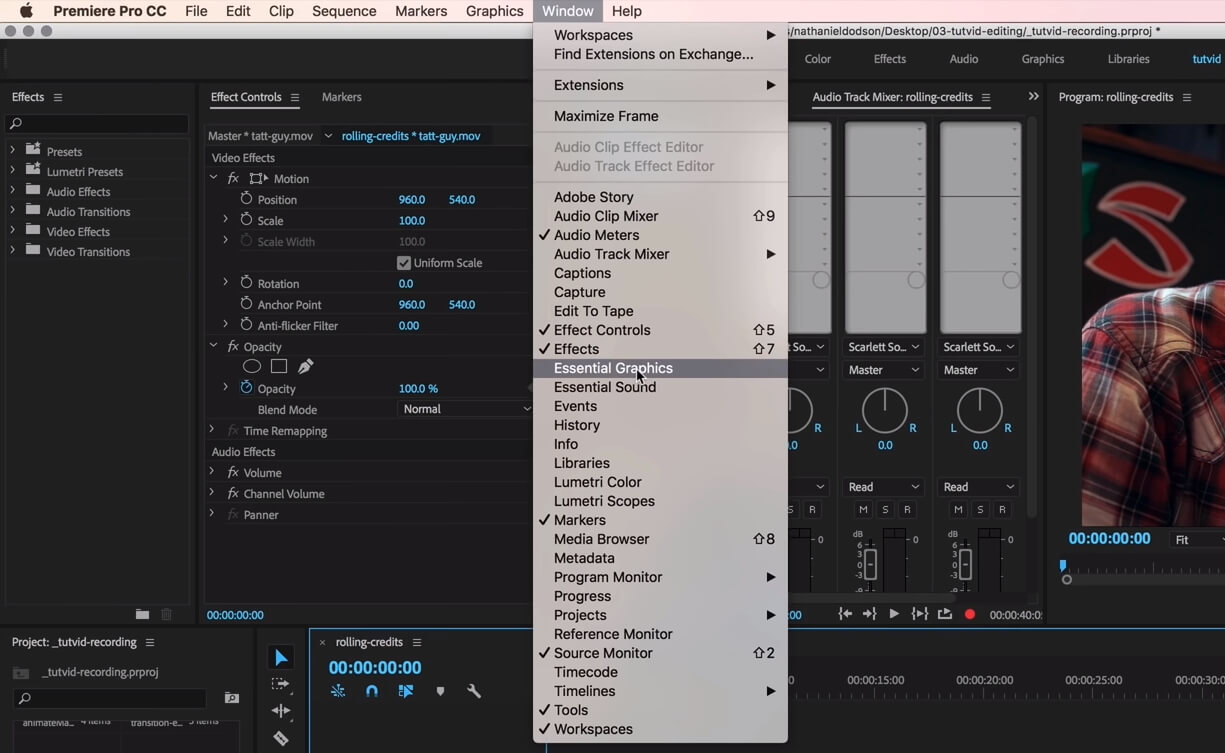
Keep in mind that you have to prepare the text you’re going to use in the video in Notepad or any other text editor before you start creating a rolling credit. Once you have the material ready, launch the project you’re working on and go to the Window menu and make sure that the Essential Graphics option is checked. The Essential Graphics panel will be displayed within the Premiere Pro’s layout, so you just have to click on the Browse button displayed at the top of the panel.
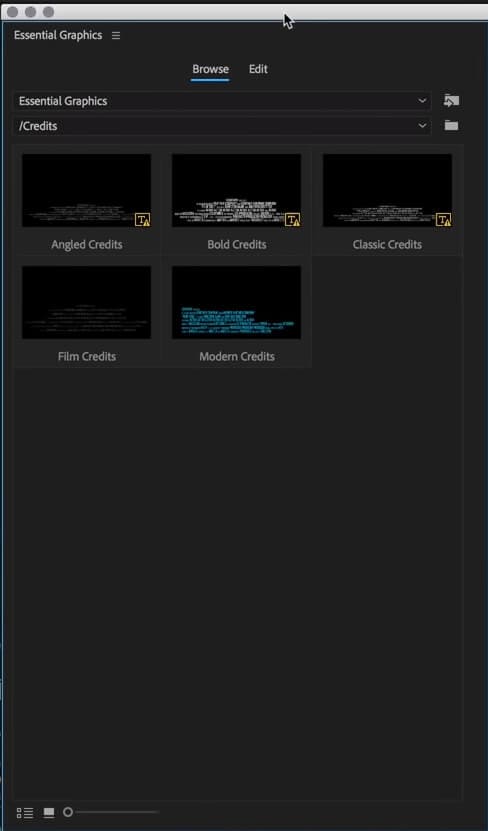
Click on the Credits folder, choose the credit roll option you like to most and drag and drop it to the exact spot on the timeline where you want the credits to appear in your video. The credit you added will contain the placeholder text, and in order to change it, you need to go back to the Essential Graphics panel. Click on the Edit button, located next to the Browse button to insert the new text or change its font and size. After you finish formatting the text, make sure that all the layers of text are deselected, so you can gain access to the Responsive Design options. Below the Intro and Outro Duration properties you’ll spot the Roll checkbox, so just click on it to enable it. You can then choose if you want the credits to start and end off-screen, adjust the Preroll and Postroll settings and Ease In or Ease Out the credits. You can increase or decrease the duration of a credit roll from the timeline by simply dragging one of the object’s ends.
2. Animating a Still Image
Video editors who want to have complete creative control over the process of making the end credits can use Adobe Photoshop to design them. If you decide to use this method of creating the rolling credits you must make sure that the file is saved in the PNG format. Once your image is ready, import it into Premiere Pro and add it to the timeline. Drag one of its ends to adjust the duration of the credit roll and then place the playhead at its beginning. Drag the picture displayed in the preview panel off the screen, and set a keyframe. Drag the picture all the way up, until its lower edge exists the screen and set another keyframe. Place the playhead at the beginning of the still image and press play to see if you animated it successfully. The best thing about this method of creating the credit roll is the fact that you can use it in any version of Adobe Premiere Pro.
3. Using the Text Tool
The text layers you create with the Text tool can be animated or edited from the Essential Graphic Panel. Simply click on the Text tool icon in the editor’s toolbar and position the text layer or layers on the screen. Insert and format the text and then head over to the Essential Graphic Panel’s Edit tab. Click on the Roll checkbox to gain access to the Start Off-screen and End Off-screen options. Make sure these options are enabled, then preview credits in case further adjustments are required and that’s it, you’ve created the rolling credits using Premiere Pro’s Text tool.
Conclusion
Despite the fact that you can create a new credit roll in just a few clicks, mastering the text formatting techniques, still takes some time. Which method of creating the credit roll in Adobe Premiere Pro do you like to use the most? Leave a comment below and let us know.
Bring up your video to a professional level with straightforward tools.
Try It Free Try It Free
Liza Brown
chief Editor
0 Comment(s)